 knowledge kit19
To understand the different elements of IVR flow follow the steps mentioned below:
- Go to Page https://kit19.com/AfterLogin.aspx
- Click Cloud Telephony
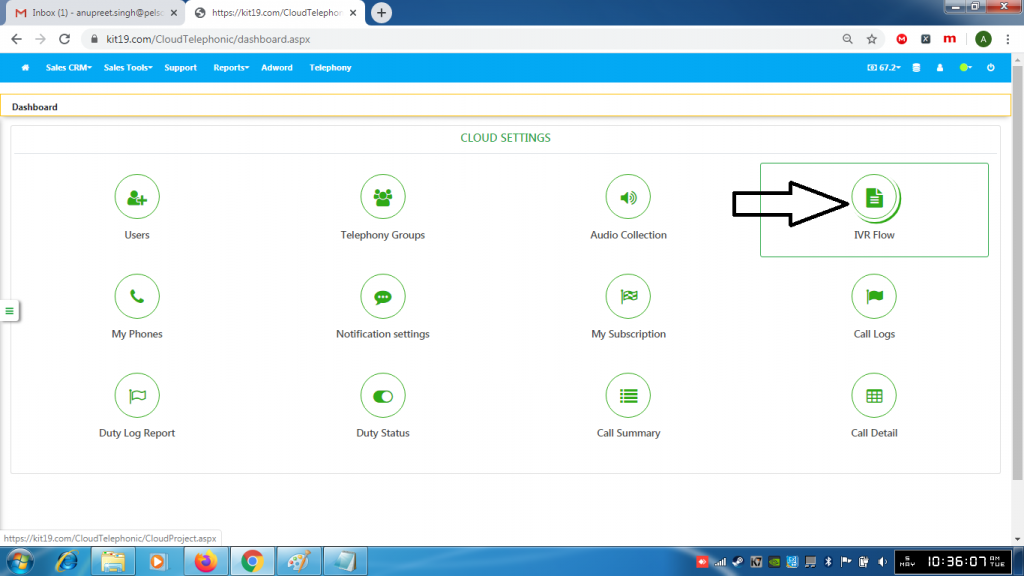
- Click IVR flow

- Click on an IVR Name
Play Voice:
Play voice lets you play a text message or an audio file to the caller
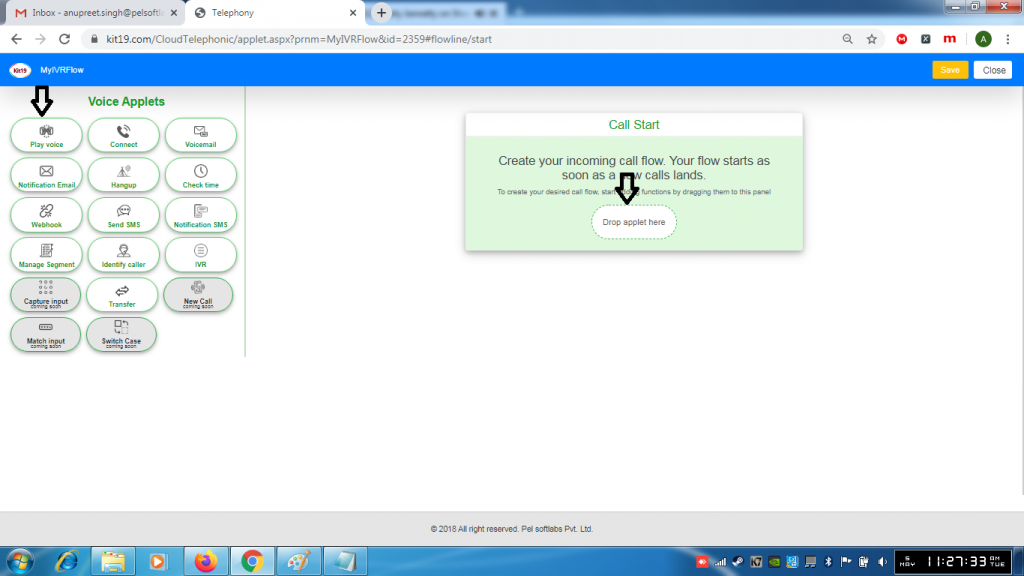
- Drag and drop play voice to the place as shown above

- You can either Speak this text or select an audio file from your public collection

- Select Speak this text
- Enter the text that you want to read out to the callers
- Click Save

- Click Select from your public collection
- Select an audio file from the list
- Click the play button if you want to listen to the recording
- Click Set As Recording
Connect:
Connect lets you choose to whom the caller has to be connected to
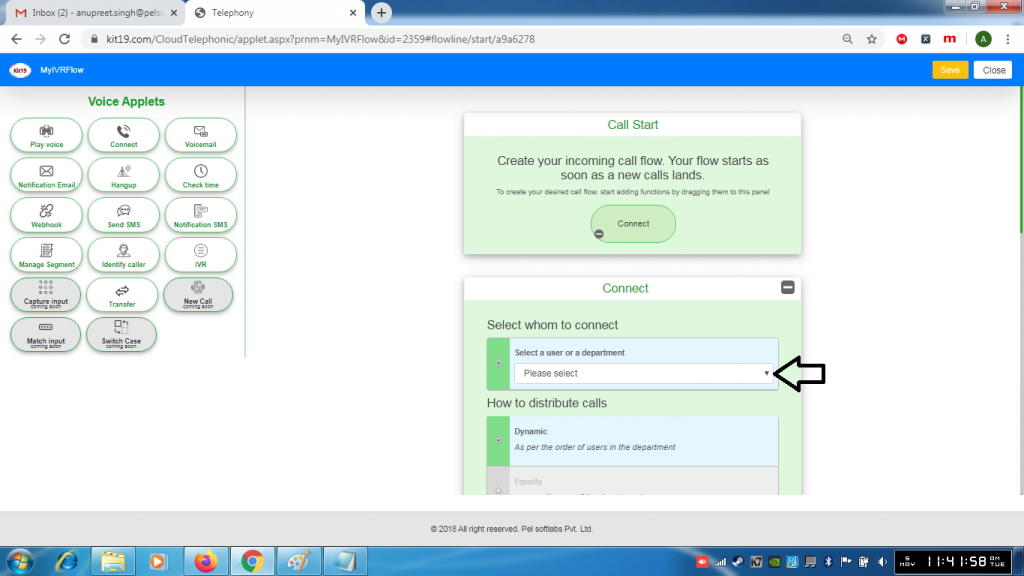
- Select a Department to which the call has to be connected
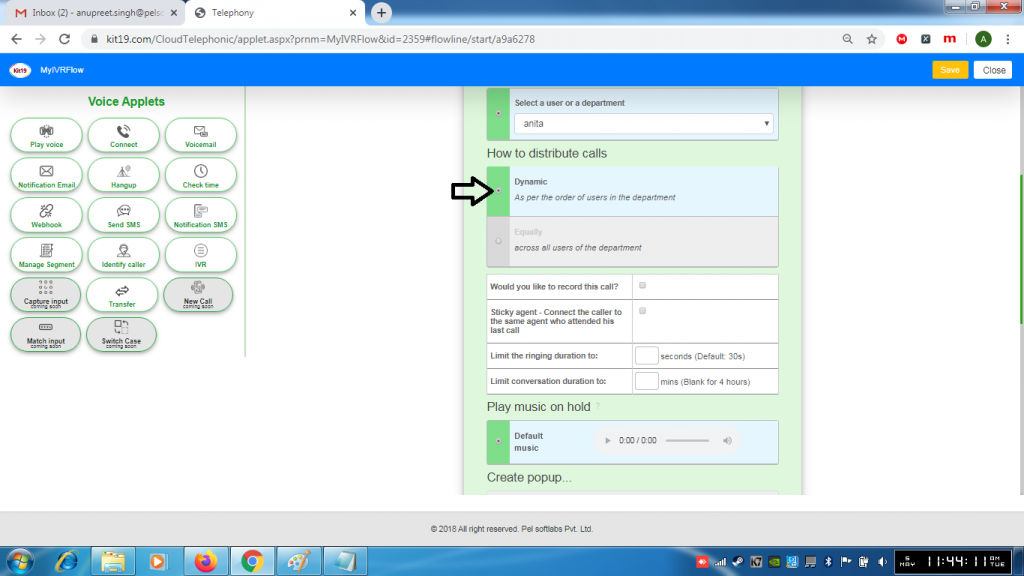
- Select Dynamic if you want to connect the caller to agents in a sequential order
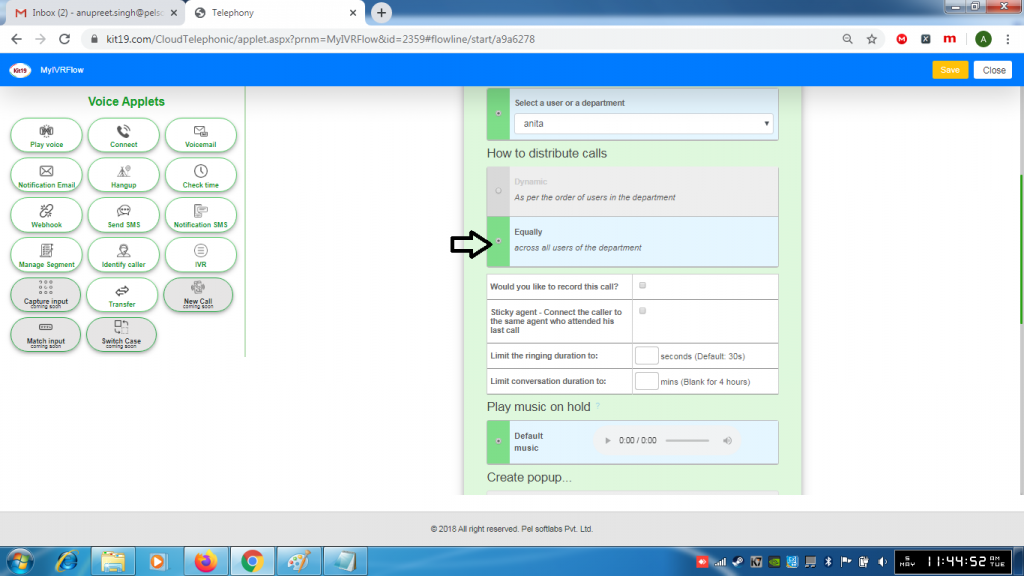
- Select Equally if you want to connect the caller to any of your agents
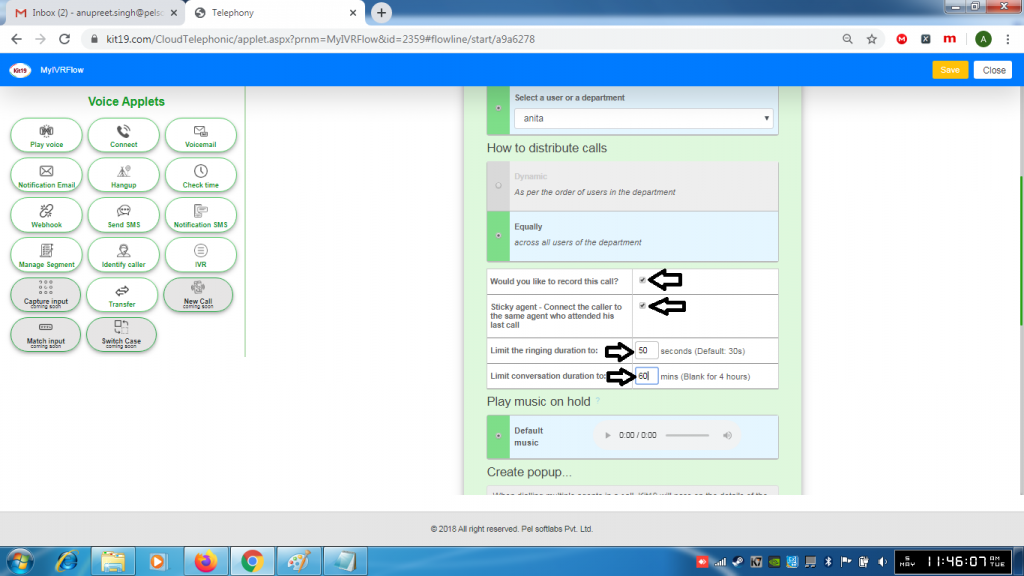
- To record the calls tick box next to Would you like to record the calls
- If you want the caller to be connected to the same agent who he talked to previously tick the checkbox next to the Sticky agent
- Enter a value in the ringing duration box, this would limit the ringing duration
- Enter a value in the conversation duration box, this would limit the conversation duration
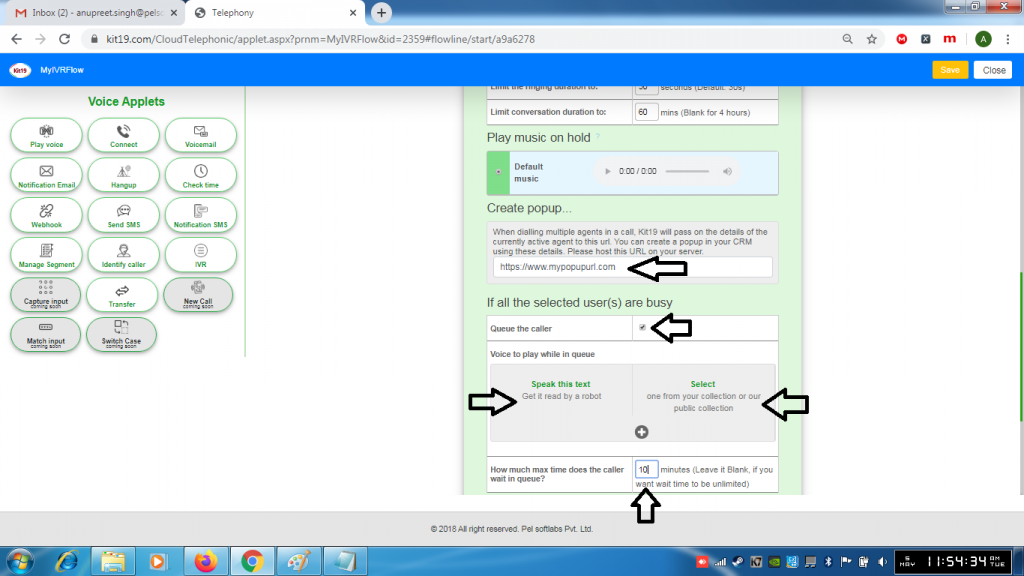
- Enter a URL to create a pop up. This pop up will pass the details of the currently active agents to the url
- Tick the box next to Queue the caller if you want the caller to wait in queue when all the agents are busy
- While the caller is in queue you can play an audio file or you can read out a text to the caller
- To make the caller wait in queue for a certain amount of time. Enter a desired value in the box
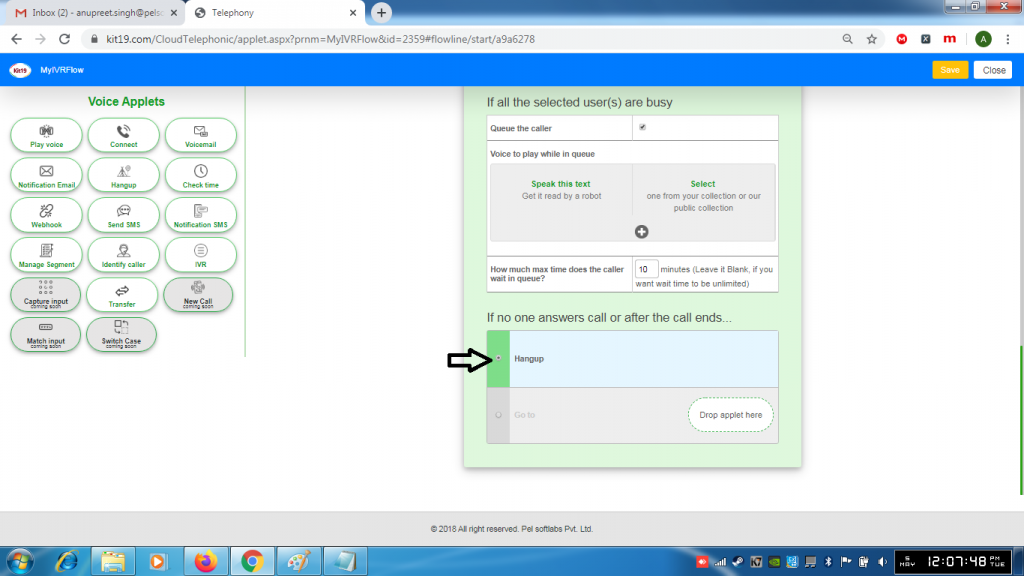
- Select Hangup if you want to the caller to hangup if no one answers the call
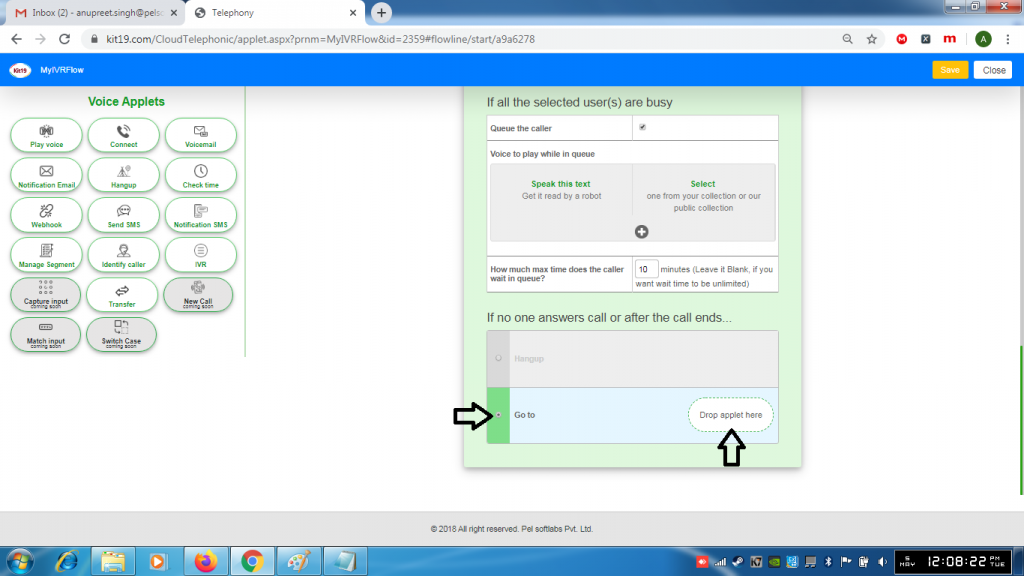
- Select Go to and drop another applet if you want to direct the user to another applet when no one answers a call
Voicemail:
Voicemail lets the caller to leave a voice message
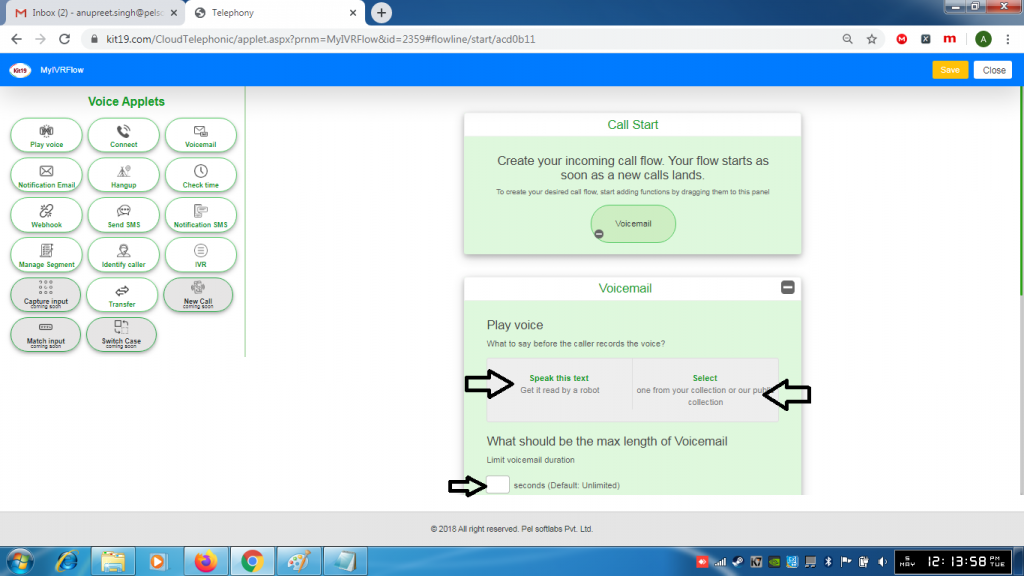
- Before the caller starts recording his voice you can either read out a text to him or play an audio file
- To select a length of the recording enter a desired value in the box
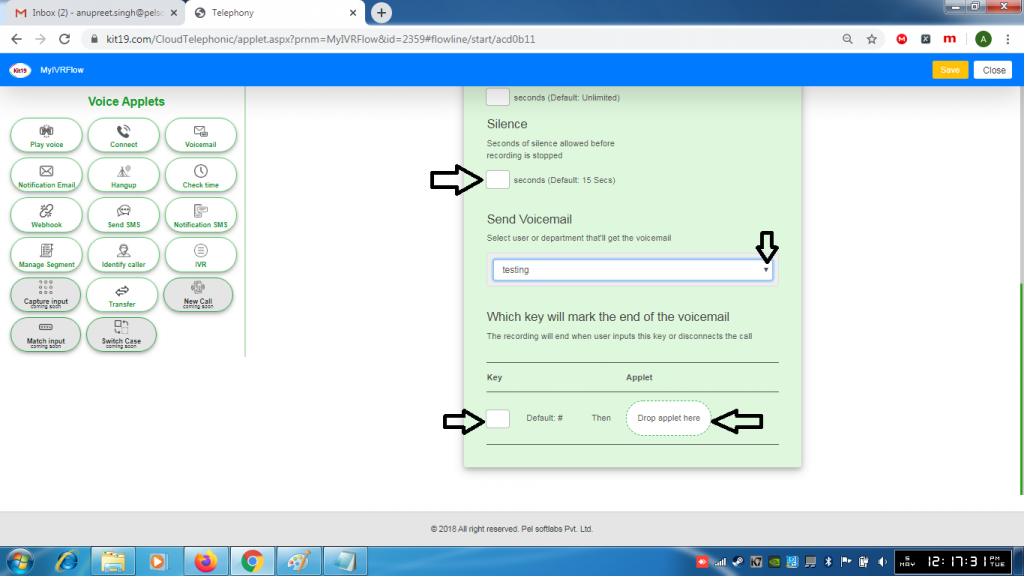
- By default 15 seconds of silence is allowed before recording is stopped. You can change this duration by entering a desired value in the box
- Select a department to which you have to send the recording
- By default pressing the # key would end the recording. You can change this key by entering the desired key in the box
- Add the next applet to the box if you want to perform a certain action after the caller leaves a voice mail
Notification Email:
Notification email sends a mail to the department of your choice with the details of the customer. This may be required if the customer call wasn’t answered or the customer waited in the queue and after the maximum allowed queue time the call got disconnected or the customer had an emergency and he disconnected the call while he was in queue or you want to call back the customer for any reason.
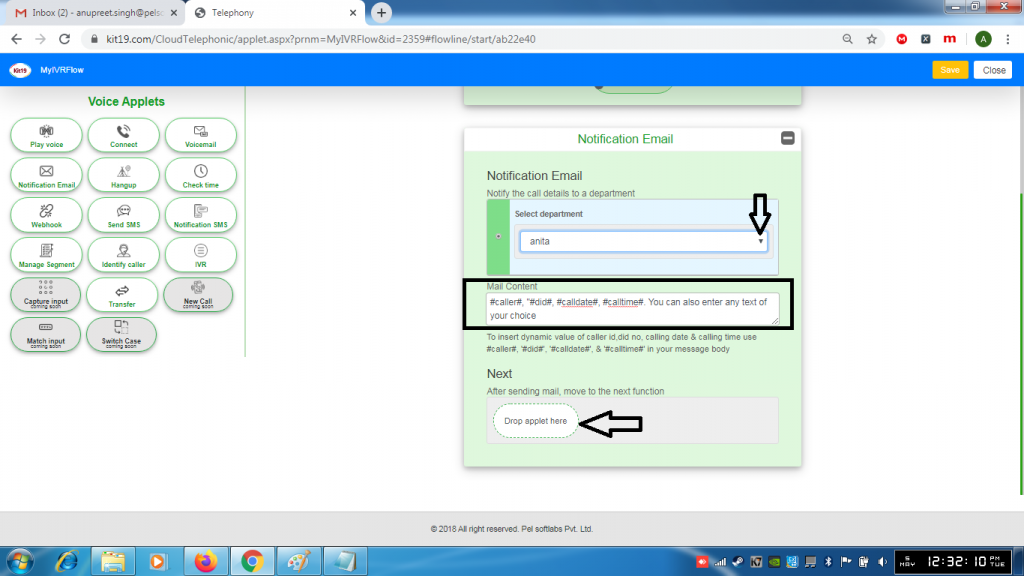
- Select a department to which the mail has to be sent
- In the mail content box enter the values as #caller# to capture the caller name, #did# to capture his number, #calltime# to capture the call time and so on
- Or you can enter you own content
- Or you can enter both of the options
- In the Next section enter the next action you want to perform after the notification mail has been sent
Hangup:
This is the last applet that is added to any IVR flow. It is not compulsory to add this applet. However it is a strictly recommended to add this applet to end an IVR flow. All this applet does is it disconnects the customer and closes the IVR flow.
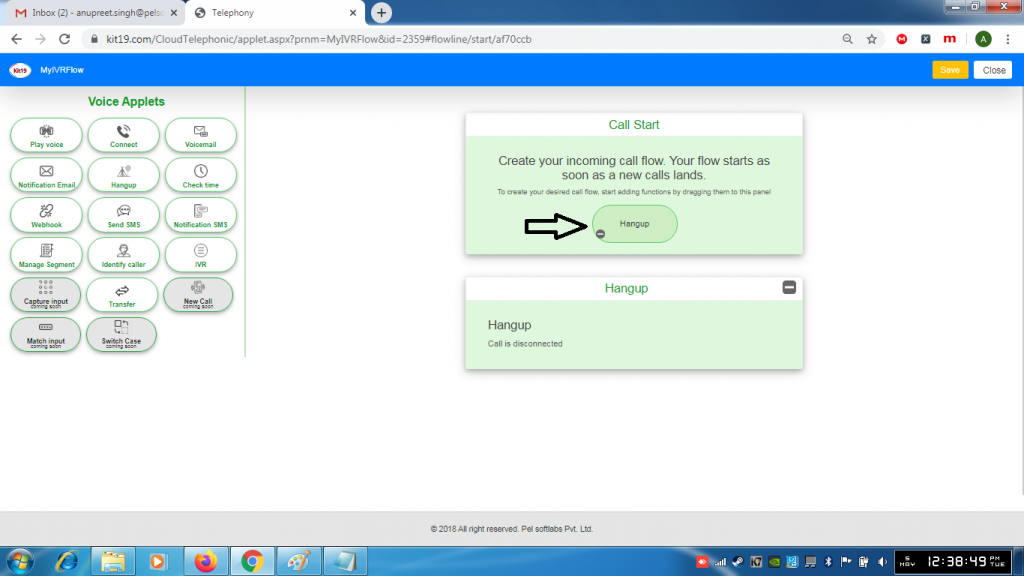
- You cannot any other applet after adding the Hangup applet
CheckTime:
CheckTime allows you to decide your business days and your business hours
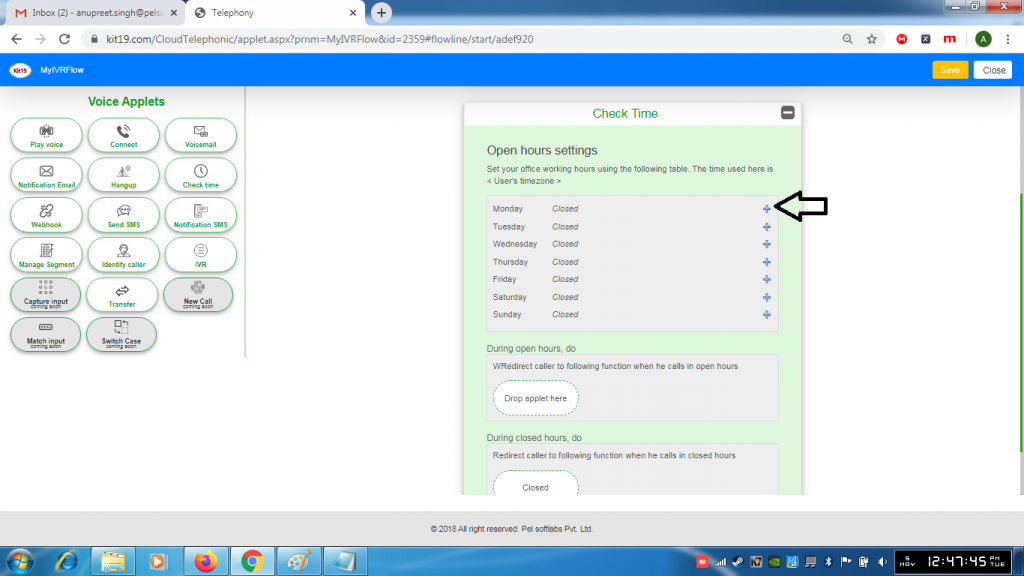
- Click the + button to add a time slot
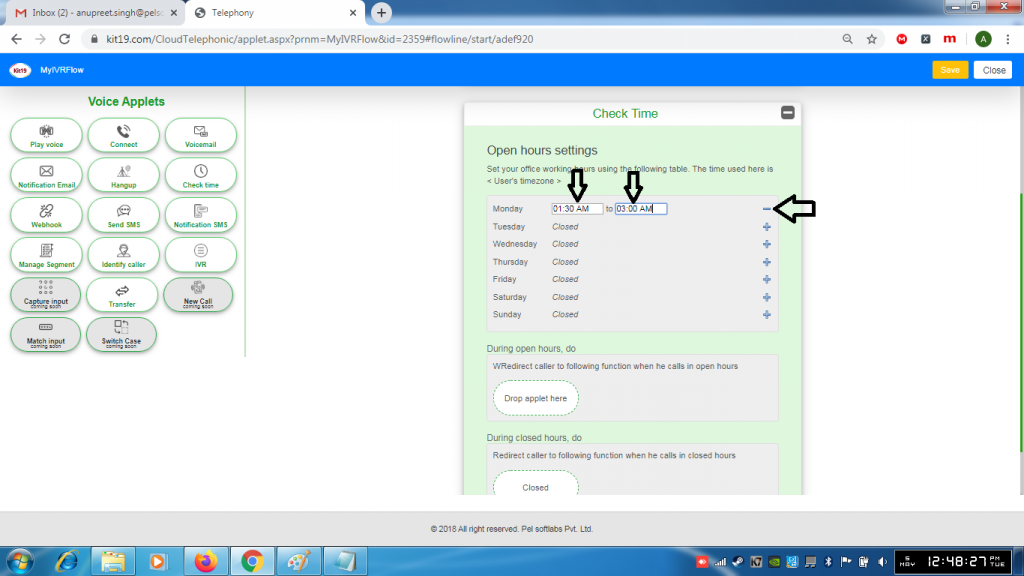
- Select from Time
- Select to Time
- To remove the time slots click – button

- You can add an applet of your choice to do a certain action when your customer calls during the open hours
- You can add an applet of your choice to do a certain action when your customer calls during the closed hours
Webhook:
Webhook lets you integrate your webhook into the IVR flow. You need to first create your webhook and then add link your webhook to the IVR flow.
To learn more about webhook go to the webform section of the knowledgebase.
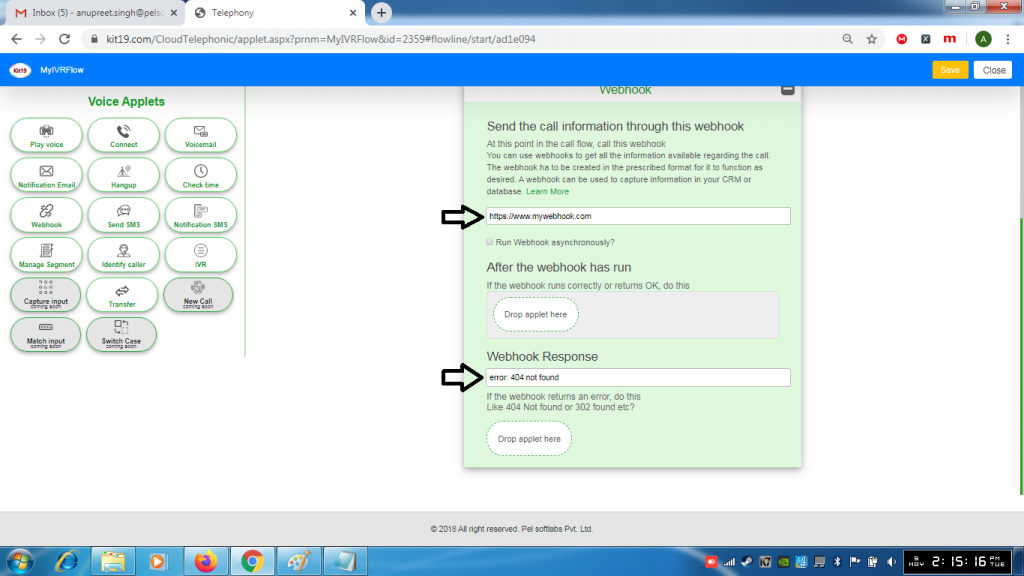
- Enter URL of your webhook
- Enter a response that you want if the webhook encounters an error
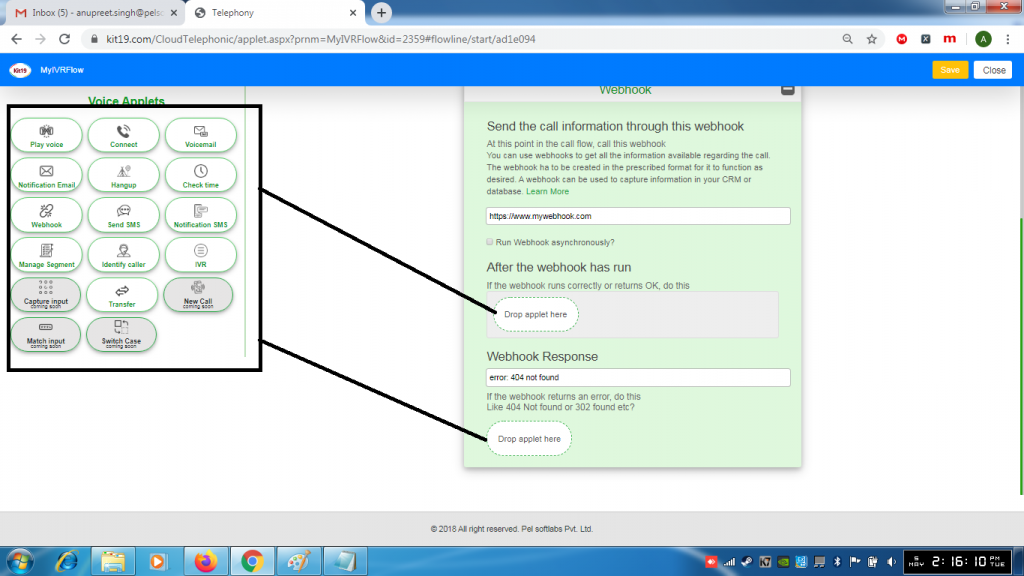
- Drop the applet that you want under the section After the Webhook has run
- Drop the applet that you want under the section Webhook Response
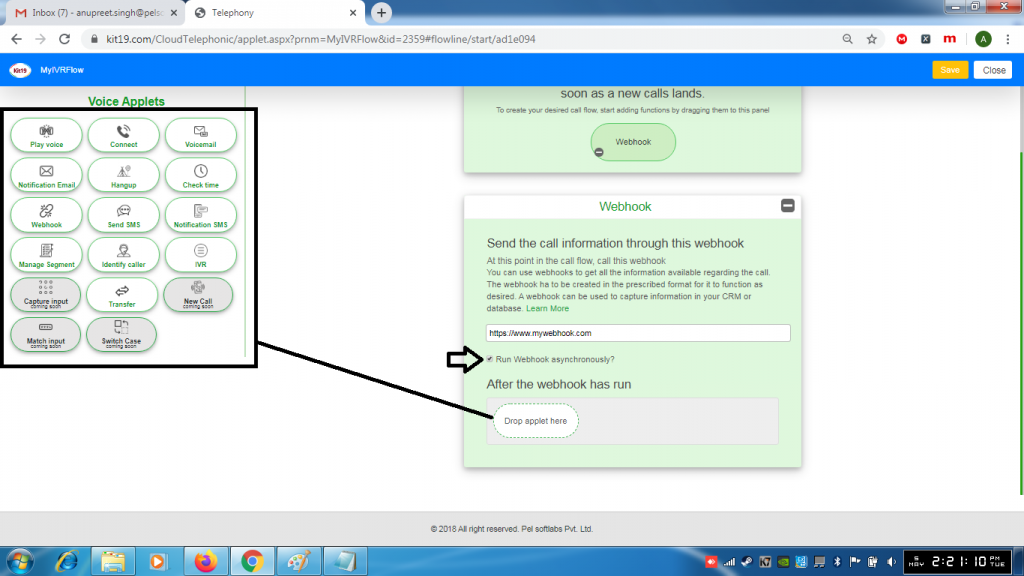
- Tick the box Run Webhook asynchronously. If this option is checked then the webhook will run in the background without waiting for the response
- Drop the applet that you want under the section After the webhook has run
Send SMS:
Send SMS allows you to send a message to the caller.
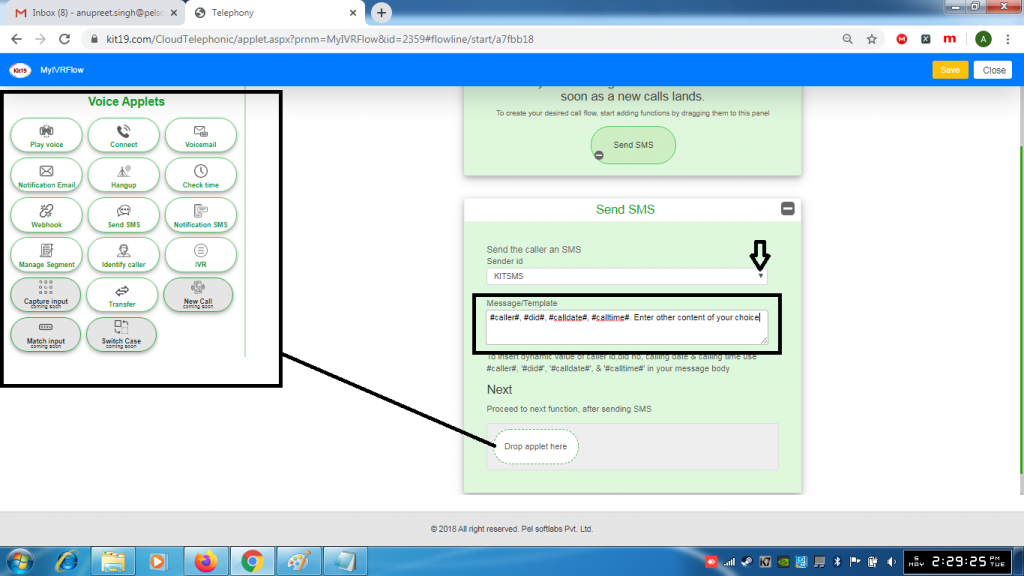
- Select a sender Id
- Enter the details of the caller that you want to capture for example #caller# to capture the caller name, #did# to capture the number of the caller and so on.
- Or Enter the content that you want to send to the caller
- Or you can capture the detail that you want and also capture the detail of the customer
- Drop the applet that you want under the section next.
Notification SMS:
Notification SMS allows you send a notification SMS to a recipient(s) of your choice

- Select a Sender ID
- Select a recipient user/department
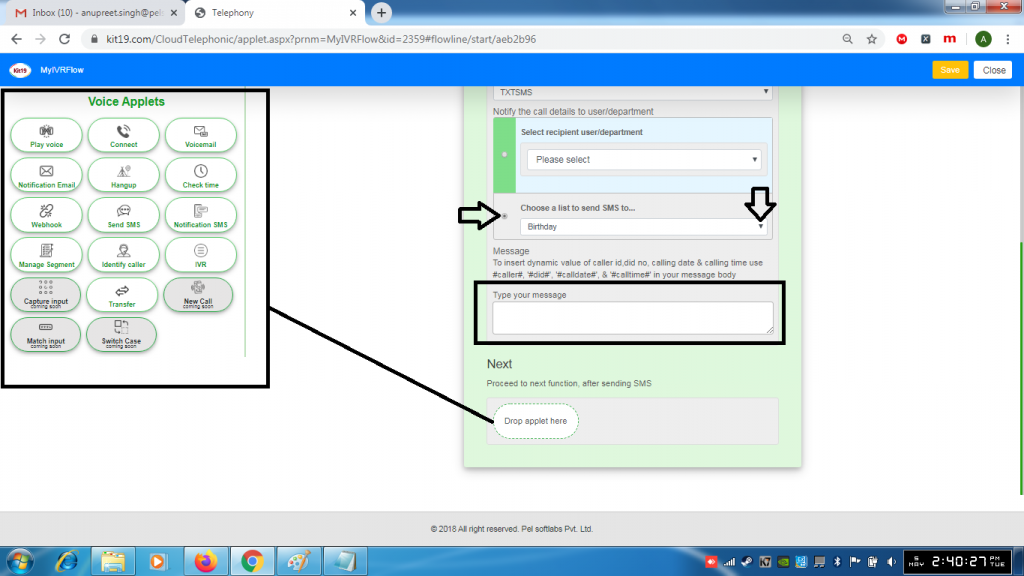
- Select choose a list to send SMS to…
- Enter the details of the caller you want to capture for example #caller# to capture the name of the caller and so on.
- Or Enter a content of your choice that you want to sent
- Or Capture details of the caller and also enter the content that you want to send
- Drop an applet of your choice under the section Next
Manage Segment:
Manage Segment lets you add or remove a user from a predefined section or a list
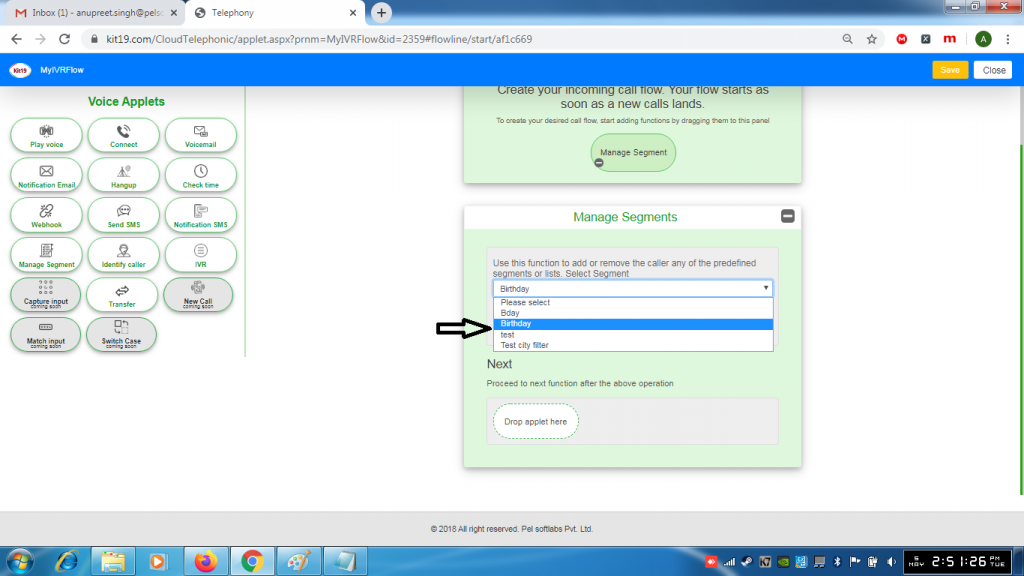
- Select a section or list
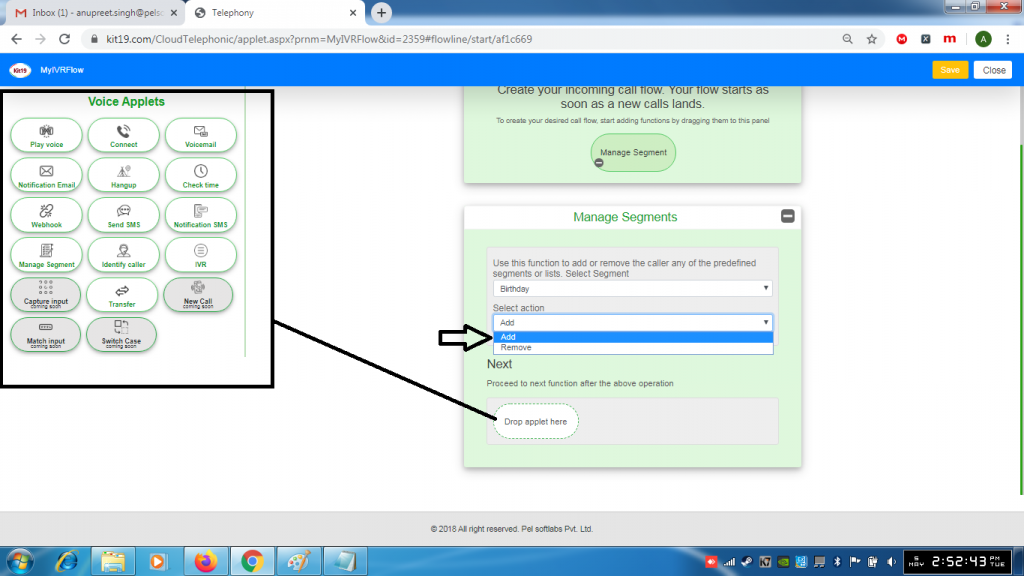
- Select an action
- Drop the applet that you want under the section Next
Identify Caller:
Identify caller allows you to find out if a caller belongs to a certain segment
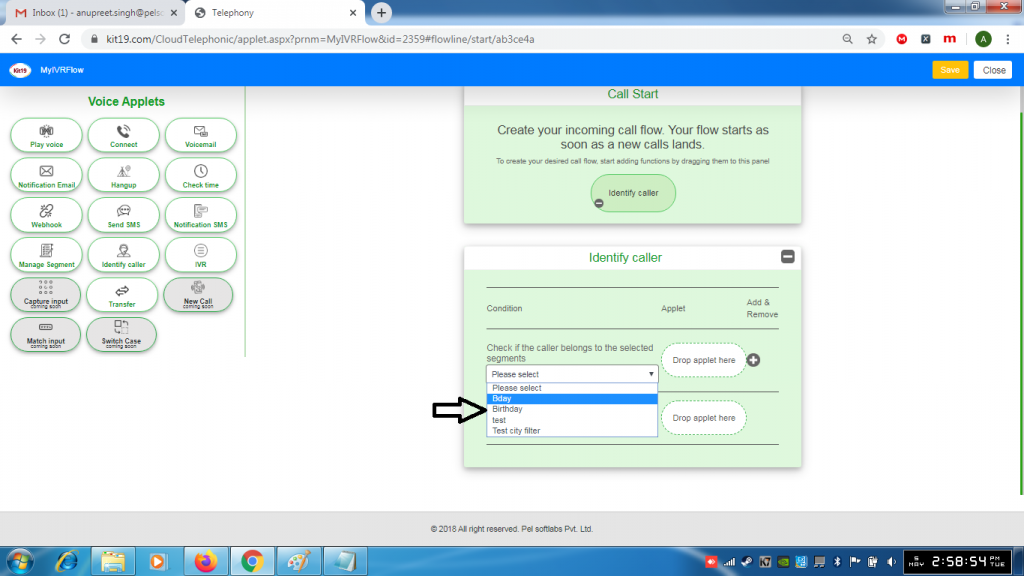
- Select a Segment
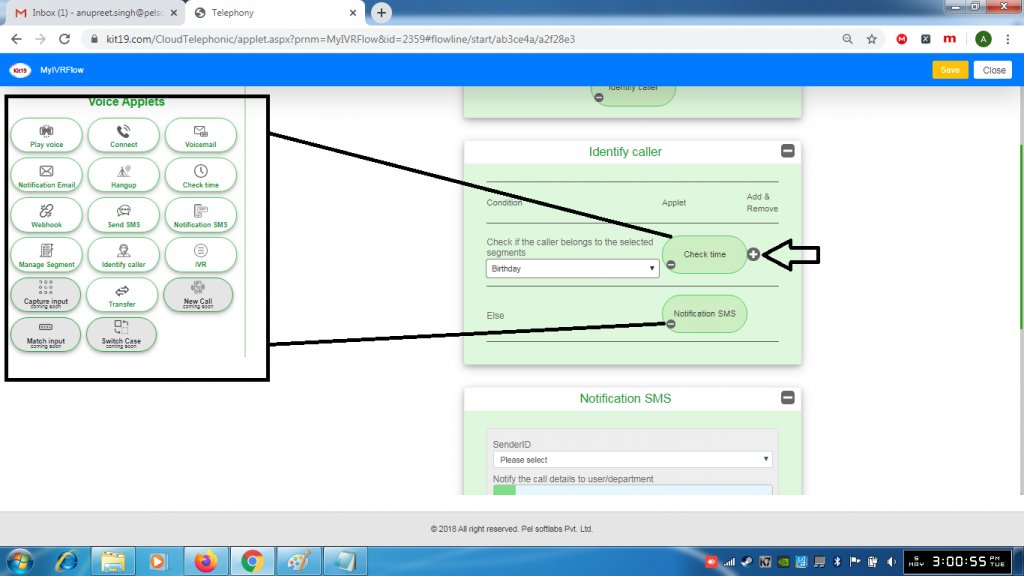
- Drop an applet of your choice next to the segment drop down list
- Drop an applet of your choice in the Else section
IVR:
IVR allows you create an IVR menu and IVR flow of your choice
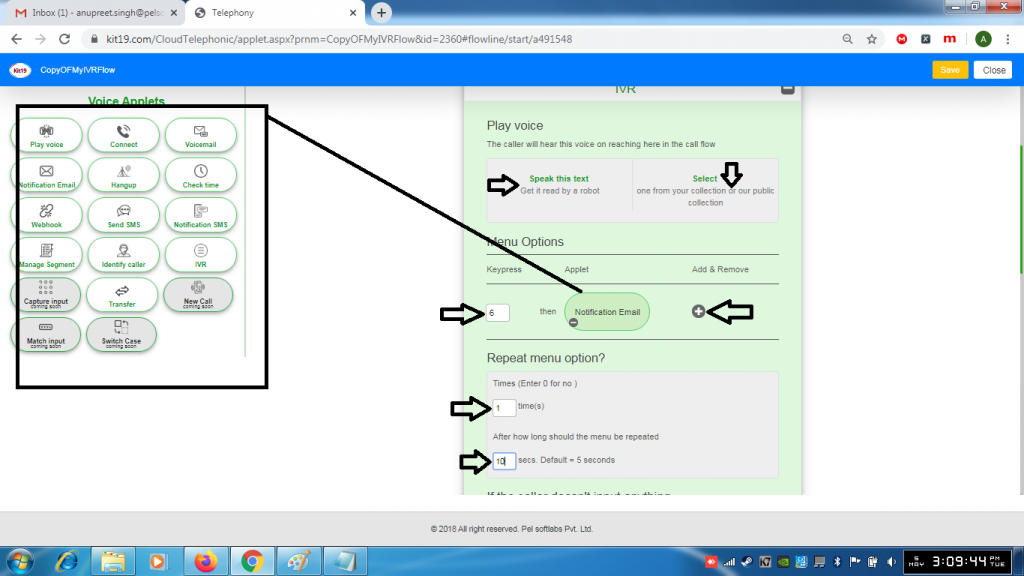
- Select read a text under play voice section
- Or select an audio from your public collection
- Under menu option enter a Key in the Key press box
- Drop an applet of your choice in the under menu options
- You can add more applets by pressing the + button
- Under Repeat Menu option enter a value in time(s) to repeat the menu options
- Enter a value in after how long the menu options should be repeated by default it is 5 seconds
Transfer:
Transfer lets you transfer the call to another IVR flow
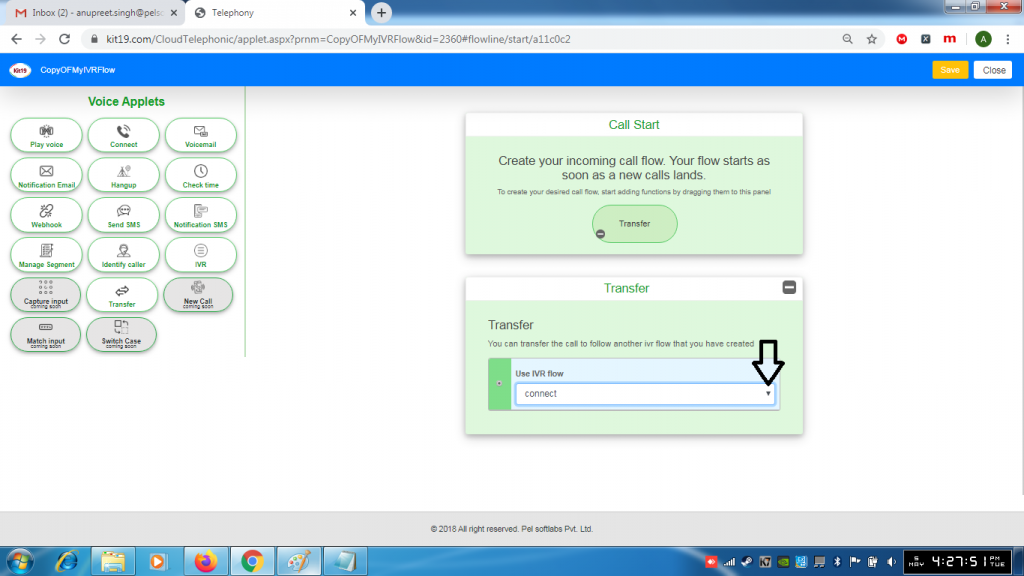
- Select a flow
- The call would be transferred to the selected IVR flow