 knowledge kit19
To design a simple IVR flow follow the steps mentioned below:
- Go to Page https://kit19.com/AfterLogin.aspx
- Click Cloud Telephony
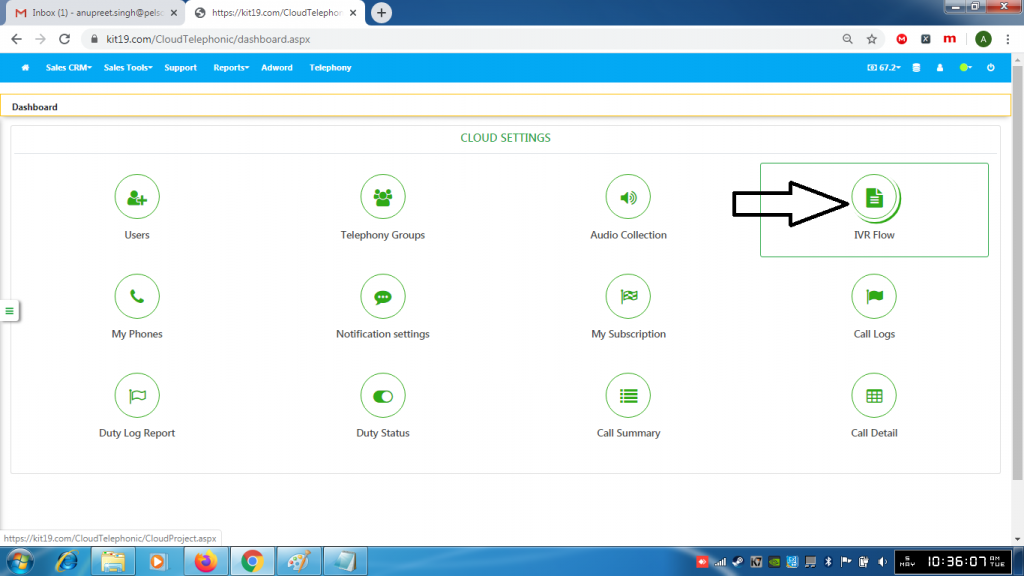
- Click IVR flow

- Click on an IVR Name
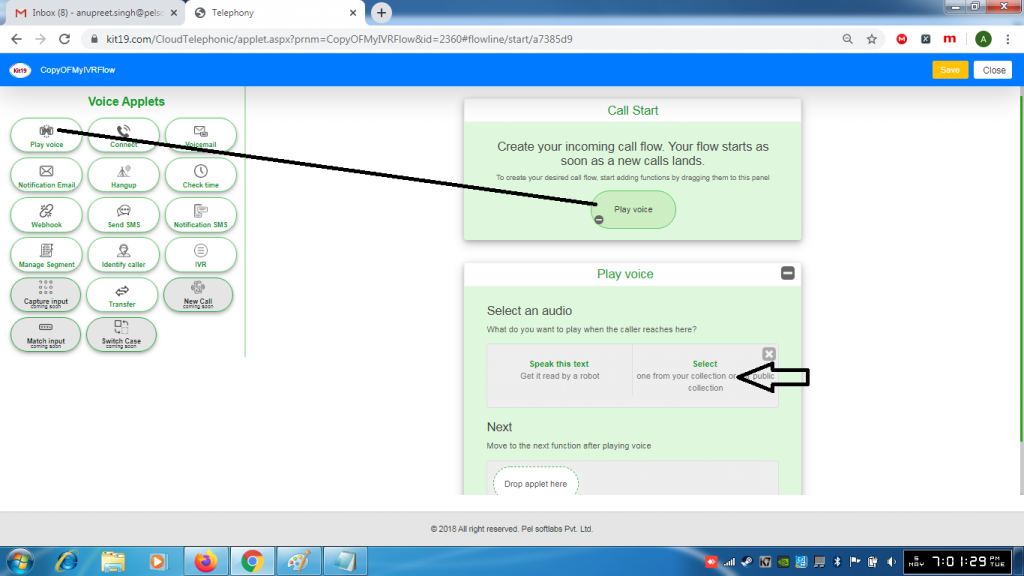
- Drop the applet Play voice
- Select an audio file or select Read out text
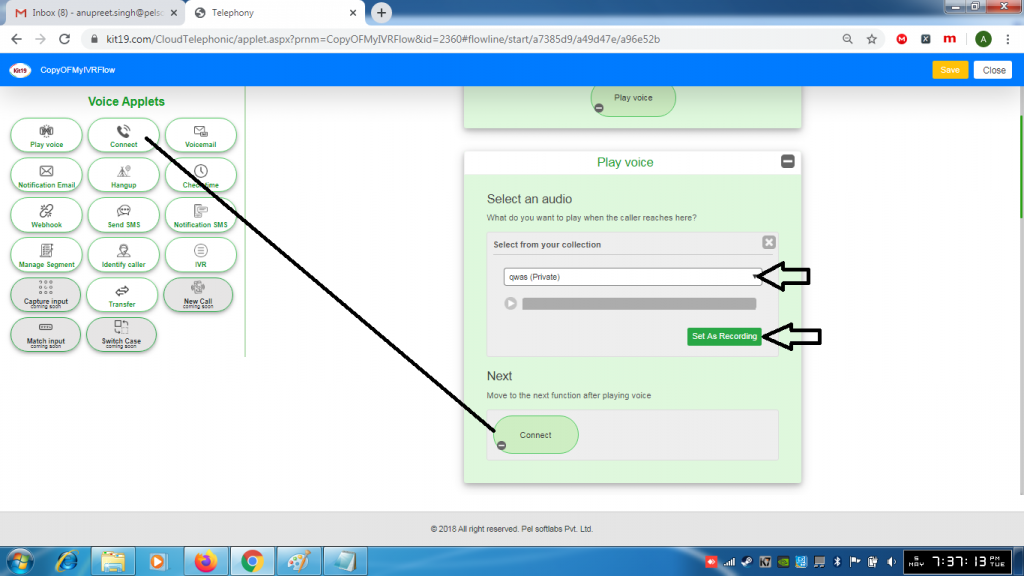
- Select an Audio file from your audio collection
- Click Set as Recording
- Drop the applet Connect
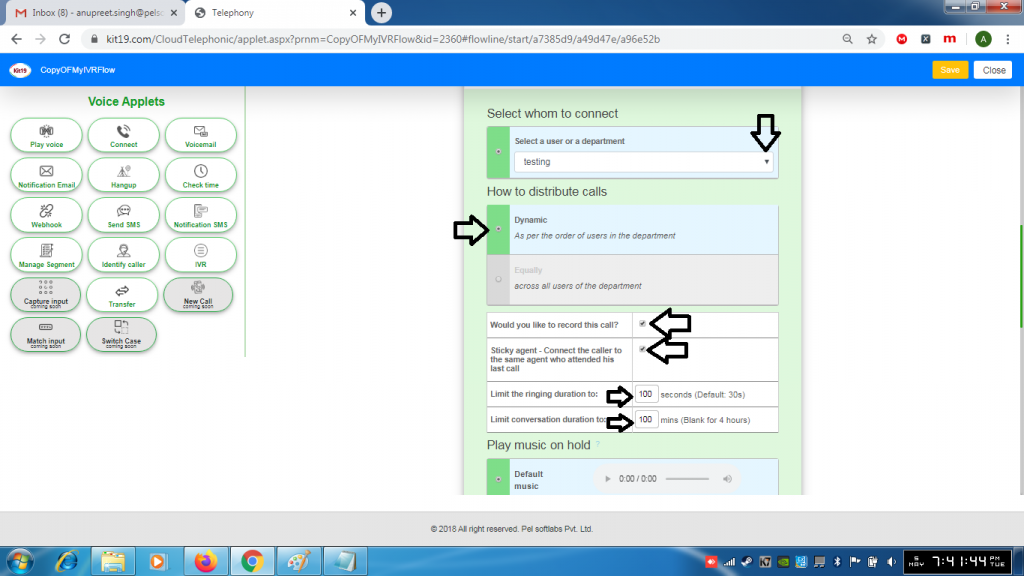
- Select a department to which the call should connect
- Select Dynamic if you call should be taken by your agents in a sequential order
- Or select Equally if you want that the call can be taken by any agent
- If you want to record the calls tick the box Record Calls
- If you want the caller should be connected to the same agent tick the box Sticky agent
- If you want to limit the duration of ringing enter the desired value in the ringing text input box. If left blank the ringing duration would be 30 seconds
- If you want to limit the duration of conversation enter the desired value in the conversation text input box. If left blank the conversation duration would be 4 hours
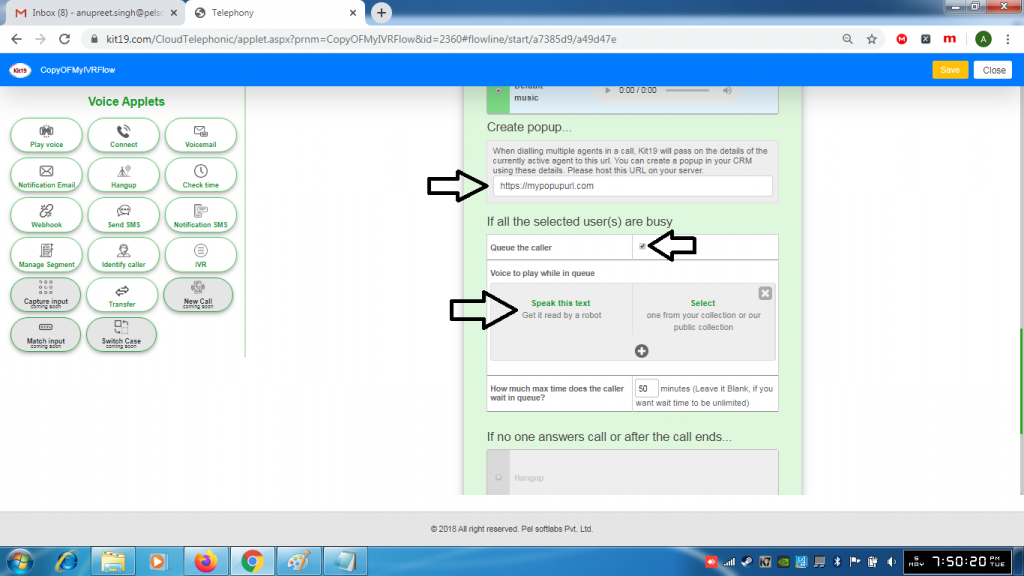
- Under Create PopUp enter the URL of the popup
- This pop up would have the details of the currently active agent
- Tick the box Queue the caller. This is highly recommended because sometimes all of your agents would be busy
- Select Read out text. This is highly recommended as you should read out a text to the caller while is waiting in the queue or you can select an audio file that could be played when the caller is waiting in the queue
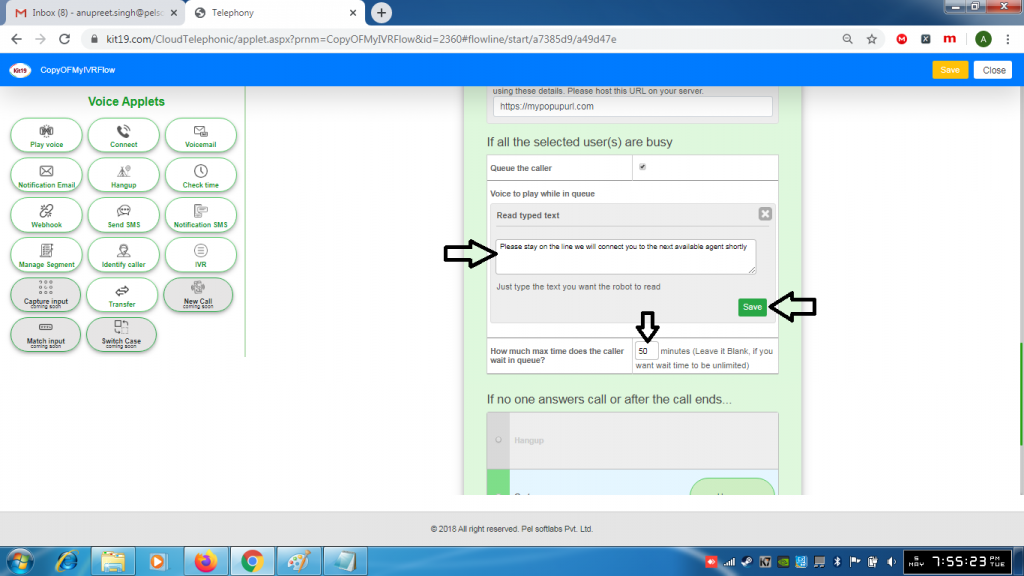
- Enter the text you want to read out to the callers
- Click Save
- Enter the duration for which you want the caller to wait in the queue. If left blank the wait time would be unlimited

- If you want to play multiple audio files click the + button
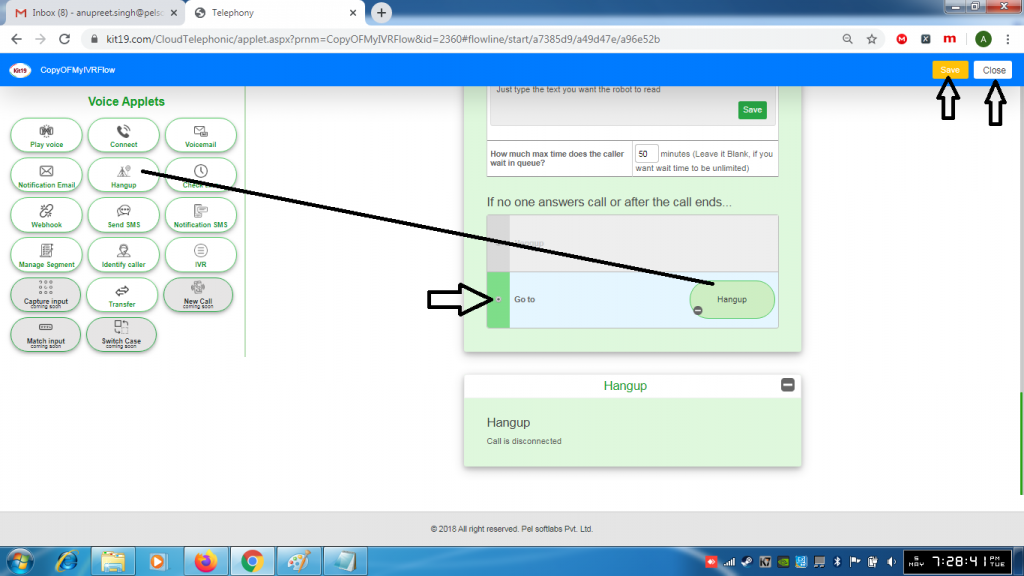
- Select Go to
- Drop the Hangup applet
- Click Save
- Click Close
Note: You can make your own IVR flows as per your requirements. This is a basic IVR flow that you should ideally have.